Friday, July 31, 2009

Pictures of the Tadpoles and the Crawfish


I couldn't get these to post in the other post without them being first. Somehow, I didn't think that was the first thing you wanted to see when you looked at my blog today. So I will try it and see if I can get them to post separately! Don't you think the little tadpole looks just like he is posing for the camera? Happy Stamping!

More "Look Here" Gift Card Holders


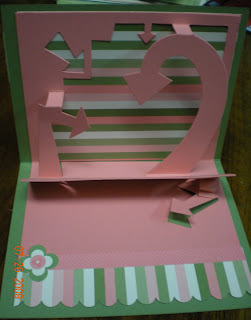
This new die has really caught my attention! Nevermind that I have had it almost a month, and hadn't even taken the wrapper off of it until Sunday morning. Sometimes, I just need an incentive to get me started--like the downline meeting is in 5 hours and I have no clue how to make one of these, let alone teach it! lol I was so pleased how easy it is to make. The directions for the die itself (#115966) is easy and they are included on the package. That makes the inside of the card. It is how you decorate the outside of the card, and also the insert behind the top panel is what really makes this die shine! I just love it. Here is another one we made using a discontinued Scrappin Kit! I hope that these samples will inspire you to get this die and use it with your Big Shot! (If you don't have a Big Shot yet, I would be glad to sell you one! lol)

Now to the part of our day that wasn't stamping oriented--my Granddaughters have been after their Pap-paw to help them find some tadpoles. When they went to get some buckets of water out of the creek to water the poor green beans, they found to their delight, that there were tadpoles there! So Pap-paw humored them and got them some tadpoles and put them in a big plastic container--that was the home to pretzel packages last Halloweeen. Made a great Aquarium though! They also got an unexpected bonus! --crawdads! (When my graddaughter was 2, she wanted to know why there weren't any crawmommies?) Anyway, the girls are enjoying watching them grow. Happy Stamping and thank you for stopping by.

Thursday, July 30, 2009

Look Here - Gift Card Holder


What a good time we had at our downline meeting on Sunday! We learned how to make the "Look at Me" gift card holders with the new Sissix die. What fun, and what a great way to use up old Simply Scrapping kits that you might have laying around! (Of course, maybe it is only demonstrators who buy them and MEAN to get to them, but never quite make it--or use part of it, but not all!) The one that I have pictured above is using our new Holiday Lounge Designer Paper. I will post another one tomrrow that uses an older Scrappin Kit, just so you can see the versatility. These will make awesome ways to give a gift card for Christmas, birthday, Baby Shower, etc. We made some with the kits and some without the kits. After we played with those, we swapped cards, and made a 3-D item for me to take to Convention to trade. It is so great to be blessed with good friends. That is probably the very best part of what I do - I meet really nice people, share what I love, and make new friends!

Thursday, July 23, 2009

Happy! Happy!

I have good news to share today. My daughter-in-law got a new job much closer to home! She started on Monday and is only 15 - 20 minutes from home, as opposed to the 50 minutes before! It is an answer to prayers. Now if she could only sell her house! This card, although it says Happy Birthday, makes me think that the butterflys are celebrating--that they are "dancing" for joy that Rhonda has a new job! The stamp set is "Flight of the Butterfly", and the color combination is fast becoming one of my favorites--Gable Green and Bermuda Bay. The technique for the little butterflies is called "Rock and Roll" You ink your little butterfly stamp first with Gable Green Classic Ink and then immediately roll the edges of the stamp in Bermuda Bay Classic Ink, and stamp on your cardstock. I used the Stampamajig to align the "dotted butterfly image" over the solid gable green Butterfly image. This was such a fun and cheery card to make! Thanks for stopping by. Happy Stamping!


Tuesday, July 21, 2009

Blooming Beautiful


This was one of the cards that we did tonight in our Sympathy and Thinking of you class. The class would have been last night, but I had to postpone it so that I could go to the funeral home. One of my very good friend's father passed away and the viewing was last night. The card didn't photograph well, but it was prettier in real life. It uses the set Bloomin Beautiful and Watercolor crayons and the Eyelet Border Punch.
I have been busy making cards to take to the Stampin Up Convention (August 5 - 7) to trade. It will be in beautiful Salt Lake City, Utah. I want to make some three-dimensional items to trade also, but it seems that time is moving much faster than I am! lol The garden is coming in, I am babysitting and I have scheduled a bunch of classes! I am barely keeping my balance on this ball! One false step, and it is going to throw me off and flatten me like a steamroller, but I have to say, I am really enjoying getting all the cards ready for my classes. It has been a real challenge, but such a lot of fun. Well, it is late and time for bed, but I wanted to get my post in for the day--even if it is almost midnight! Happy Stamping!

Monday, July 20, 2009

New Washer!


Well, instead of fixing the washer, we went and bought a new one! Turns out the old one was 18 years old - decided it probably wasn't worth trying to get it fixed. We went to Lowe's when it opened and bought a new washer. I am already wishing I had opted for a lesser model. This one has more bells and whistles than I know what to do with. I fell for the energy saving sales talk! I will give it a whirl tomorrow. And my granddaughters are finally home again! They have been gone all week, and almost all of the week before. They are here spending the night tonight, and I am extremely grateful that everyone is home safe and sound. Did I mention that my son went on a motorcyle trip this week? You can guess how thrilled I was about that. Was good to have everyone back here tonight for dinner - new potatoes, green beans and cucumbers were right out of our garden. Good eats! In case you are wondering - I did have steak and gravy to go with it. Also Zucchini bread for dessert.
Today's card is one that we made in Stamp Club this afternoon. The stamp set is "Flight of the Butterfly" and it is cased. The ladies loved using our new butterfly punch. When you open the card, a slew of little butterflys pop up, on a spiral. The small half pearls are from the Pretties kit and I think it makes the card look so elegant! That is why it is such a surprise to see the whimsical little butterflys pop up when you open it! Thanks for stopping by. Happy Stamping.

Saturday, July 18, 2009

Took a Jaunt Today!

Today my husband and I decided that we could take some time out and go to Cabelas, avbove Wheeling, WV. We hadn't been there in quite some time, and boy, oh, boy! Talk about improvements! For those of you who don't know, Cabellas is like a Bass Pro Shop and Smoky Mountain Knife Works all rolled into one. We started with the aquarium - very nice array of fish, then on around to see the African Elephant and other animals exhibit. So nicely done. At the center of the store there are all kinds of mountain goats, polar bears, etc. I found animals that I had never heard of--not even in the crossword puzzles! They were aweinspiring! I don't want to mislead you - there were tons and tons of merchandise for sale too, there was cooking utensils, dishes, tents, fishing rods, guns, everything that you might expect to see in a high testosterone place of business. You ask what are the women doing while the men are hyperventilating over all these wondrous displays??? They checked out the homemade fudge in the general store area, checked out the restaurant, the clothes, the shoes, and of course the above named exhibits. Then she sat down on one of the many resting places and pulled her trusty book out of her purse and read a bit. Or, different scenario--she dumped him and went on down the road to one of the many new stores that have opened! JC Penneys, Kohls, Panera Bread, Applebees, Dress Barn, Bob Evans, Petco, and the very closest to Cabellas???? The Russell Stover Candy store! There was even a Michaels. After a nice stop for dinner in Parkersburg we went to Crafts 2000! Wow! I bought some project storage boxes, and I eally like them. They are clear and I can tell what is in them. We came home and I washed the clothes. You note I said, Washed. The washing machine quit working at that point. It rinsed them, but it wouldn't spin thne water out, and it ran the tub over, so we had to mop the floor, take every last piece of clothes out, wring it out, and hung up on the lines on the porch--At 11 o'clock at night! What Fun. The water had to all be dipped out of the tub, and there it sits waiting for the Washer Angel to fix it!
I made the 2 cards at the top of this post after the washer episode. I do have more cards to post this week, but for now, I am ready to head to bed. I have church and a Stamp Club tomorrow. Happy Stamping!

Thursday, July 16, 2009

Holly Jolly Christmas

This card was made by my Daughter, Mary Ann. She is the co-creater of my blog. Actually she does all the technical stuff and I do the writing. She is a new stamper and is getting really good at it. I don't think that you can see it from the picture, but there are torn pieces of white cardstock to make the layers of snow! She has cut and placed each tree, Santa and Rudolph! I love this card. It is all from the set, Holly Jolly Christmas. I just love it! Thanks for sharing with us! I love getting my Christmas cards made early--but unless I get started making my cards to trade at Convention, I am not going to be ready for that, let alone be ready for Christmas! Happy Stamping!

Wednesday, July 15, 2009

Funny How Things Work Out!


I spent a good part of the last weekend working on straightening and cleaning out my stamping area. I had retired sets of stamps, and partial sets, kits, markers,--everthing a mess! So I decided that I would put the words that I used into groups--birthday wishes, Christmas, Thank You, Baby, Wedding, etc. And I got rid of a lot of extra boxes that were left over when I combined sets. I rearely have a call for wedding or baby much for myself, but decided to keep those anyway for cusomer use in classes. Today, I got a call from a friend of mine asking me if I would make Baby Shower Invitations for her daughter's baby shower! Wasn't I proud of myself that I knew where those Baby Stamps were!!! She wanted it to have Lady Bugs on it as the baby's room is being done in Lady Bugs! Would you believe that another friend of mine had created invitations for the very same request a year or so ago--and I still had one of her favors, which I was able to turn into an invitation! I have come up with 3 choices, and may work on another one later today. I am including all 3 possibilities in my post today. The first one is very simple and just has a line of lady bugs. The one on the right, uses a pretty in pink onsie on a dotted swiss white background. The little white strip across the front of the onesie has a marching line of ladybugs. In the last samples, the Onesie IS the card itself. It is hinged at the top, and the you can put whatever sentiment you wish in the outside.

Happy Stamping!

Tuesday, July 14, 2009

Take Wings And Fly


Well, Yesterday did not go as planned! I was on the computer checking my e-mail when news came that the new Holiday Mini was online for demonstrators! I can't begin to tell you how much I really love it!!!! This is the best one that we have ever had!! New stamps , new dies, new designer paper!!! Yes, I am estatic and it shows! I can hardly wait till August to share it with you!
(PS, I didn't get my perm either, by the time I got through drooling over the new mini, it was time to get the other card ready for tonight's class!)
Now, on to the post of the day! I love butterflys! They are such a joy to watch as they flit from place to place. We tried to recapture that feeling with The Flight of the Butterfly" stamp set in last night's class. This set is very versatile with all the curvy words that come with it, and the various butterflys--spotted, flowered, plain solid! We used Almost Amethyst Card stock with a striped piece of Tea Party Designer paper. We used a sponge to put Almost Amethyst ink on the big flower from the Pretties Kit (doesn't show up well in the picture, sorry!) The the smaller flower was sponged with Pretty in Pink Ink. The Center of the flower is a pink circle brad from Circle Fire Brads (#109110). There is a piece of 1/4" white grosgrain ribbon across the center of the card. We attached the flower with mini glue dots. We took that one step further with the Pop Up Butterflies on the inside of one of our cards. Such fun! Hope you enjoy seeing it as much as we enjoyed making it. Happy Stamping!

Monday, July 13, 2009

Monday - Off and Running!


Good morning! Today with my granddaughters out of town, I am wondering what to do with myself! Guess I probably should go get that haircut and perm that I have been needing for the last couple of weeks! Before I hit the road, I wanted to post a couple of samples from the Christmas in July Class that we did over the weekend. The first one that looks like the present, is done with a Cuttlebug folder in the Big shot for the white part of the card and the punches used were the Scallop Circle and the new Snowflake punch. So simple, and so easy.

The other card is also easy, but it looks more complicated. The base layer is Handsome Hunter, and the next layer is Real Red Cardstock. We stamped the skaters (from Winter Post) first, masked them and then stamped the trees (from Lovely as a Tree). Next we used an oval cut with the Big Shot and our Ovals die, as a mask and sponged Bashful Blue all around the oval, which creates the spotlight on the skaters. We colored the skaters with watercolor pencils and used blender pens to enhance the colors. (I might add that all my stampers did a MUCH better job than I did with the coloring!) We finished it off by adding the little deer from (Winter Post) and then put a little Crystal Effects, applied with a cotton swab--the cheap ones work best, as they don't have so much cotton that you can't get into the small places. We topped it all off with a sprinkling of Dazzling Diamonds on the Crystal Effects, for an icy, snowy look. This was my favorite card of the day. Thanks for stopping by. Happy Stamping!

Sunday, July 12, 2009

Classes!


What a great time we had at our "Christmas in July" class on Saturday! We had one new stamper, and it was such fun to watch her catch our joy in stamping! We started out with a very, very simple card--didn't want to scare her away the first thing! Then we moved on to more complicated cards. I also had 2 of the cards ready to show them that we are going to be making in the "Flight of the Butterfly" class on Monday night. I will post those for you later in the week. I am still working on the fourth card for the class-just finished cutting the pieces for the third one--and the class isn't until tomorrow night, so for me, I am ahead of the game!

Today was a really nice quiet day here. I slept in and then went to lunch with my family, before they all scatter for the week. We had company for dinner tonight, a long time friend that shares our love of a West Virginia favoite--fried green tomato sandwiches. Well, actually, these were fried zucchini and bacon sandwiches--our tomatoes haven't gotten big enough to fry yet! And as the zucchini are plentiful from the garden right now, we had fresh, warm zucchini bread straight from the oven for dessert! One of my favorites, and so easy. You don't even have to get the mixer out! My kind of recipe. Zucchini Bread
1 cup salad oil
3 eggs, slightly beaten
2 cups sugar
2 cups grated raw zucchini (I kind of pack it in, and let the excess juice overflow)
2 tsp. vanilla extract
3 cups all purpose flour
1 tsp. soda
1 scant tsp. baking powder
1 tsp. salt
3 tsp. (heaping) ground cinnamon
1 cup chopped pecans
1 cup shredded coconut

Combine oil, eggs sugar, zucchini, and vanilla in a large mixing bowl Blend well. Stir in flour, soda, baking powder, salt and cinnamon. Do not beat. Stir in pecans and coconut. Spoon batter into 2-well greased 8 ½” x 4 ½“ x 2 5/8”
loaf pans. Bake at 325 degrees for 1 hour or until done.
Enjoy! And thanks for stopping by today. Happy Stamping!

Wednesday, July 8, 2009

Christmas In July!


As hot as it is here these last few days, it is hard to think about Christmas, but it is time for my Christmas In July Card class! But I will just crank up the air conditioning and get stamping! lol We made one card tonight at our Stamp Club--tonight's technique was embossing. So we used the snowflake from Best Wishes and More, the tree from Snow Swirled and the little deer from Forest Friends. We stamped the snowflake with Versamark and embossed them with clear embossing powder. Then we brayered over the embossed images with bashful blue classic ink. The tree and the deer are stamped on Cardstock Vellum. The ribbon is the beautiful 5/8" white satin. I love the feel of it--feels luxurious. The other card was made using our Movers and Shapers die with the new scalloped oval die! The whisper white insert was stamped with a stamp from Short and Sweet. The snowflake was again from Best Wishes and More, and was also stamped with Versamark. This card wasn't one of our cards for tonight, it was just a demonstration of the Big Shot. With our special this week of the Doctor's Bag for $49.99, it seemed a good time to demo the Big shot again!

Tuesday, July 7, 2009

And The Winner Is . . . .

I want to thank all of you for participating in the RemARKable new Catalog Blog Tour!

$50 Grand Prize Winner is – Sondra Branson

Congratulations to the winner of the Scavenger Hunt! She was chosen at random from all entries to my blogsite. Karen Kerr Please email me with your address, so that I may have your prize sent to you.

Again Thank you all for going blogging with us!
Happy Stamping

Upsy Daisy


Today's card is based on a picture of a card that was in a recent Stampin Success magazine. (This is the magazine that demonstrator's receive monthly with ideas, samples and tips) The technique was embossing on Designer Paper. This was a card that almost didn't happen. I had all the cardstock cut, and I went to get the stamp set, Upsy Daisy, and I couldn't find it! I looked in all the drawers, on the shelves, everywhere, and it was not to be found. Thank God for good friends. I called one of my friends from the stamp group and asked her if she would bring her set for us to use tonight! And she did! She came early, so I was finishing the sample as the group came in the door. That is cutting it a little too close, even for me! lol The designer paper is Raspberry Lemonade. And the cardstock is Melon Mambo. As a side note - during the process of looking for the stamp set, my daughter-in-law was here and she helped me search. She took out the bottom desk drawer for me, as I knew there were a few things that had gotten pushed out over the top of the drawer, and were now in the bottom of the desk. FEW???? Turns out there were 7 adhesive refills, 3 packages of Ribbon Originals, 2 spools of ribbon, a small skein of yarn, 10 whole sponges and some pieces - 3 whole packages!, and a few odds and ends like bags, paper, etc. Now I know where my missing spool of chocolate grosgrain ribbon went! Unfortunately I still haven't found my missing set of stamps! Happy Stamping!

Monday, July 6, 2009

Autumn Days Sample


I had a chance to stamp today using the new set, Autumn Days! I love the way it looks using our new color, Dusty Durango. The largest piece of cardstock is Soft Suede, also a new in-color. I masked the birds to sponge in the background colors, and then I stamped and cut out the 3rd bird and used stamping dimensionals to place it on top of the other two birds. I used the large oval punch for the "hinge" and a very vanilla 5/16" jumbo brad. The sentiment is from Sincere Salutations. I can't wait to make a card using the leaf stamp that comes with this set. But for now, I am off to cook supper! Happy Stamping!

Sunday, July 5, 2009

For All You Do!


I love this new stamp set! (For All You Do - #115360) I have had it since March, it just took me a while to get to using it! lol I love the polka dot stamp that is in this set. You ink it with one color and the flower with another--then "Kiss" the flower stamp to the dotted stamp, and voila! You have a polka-dotted flower!!! So simple, yet so striking. I know, it doesn't take much to amuse me. That's ok. The little flowers are made with the Trio Flower Punch (#109183) I found an easy way to get holes in the center of those little bitty flowers, to put in the brads. If you first punch a set of flowers out of scrap paper approximaately 1 1/4" x 3", save the "negative" strip - the one where the flowers were punched from. That will become your template. Place it over the strip of paper that you want to punch your REAL flower from. Take your pen and mark a dot in the center of each flower through the template. (You will be marking on the paper from which you will now punch your flowers.) Before punching your flowers, take your 1/16" hole punch and punch a hole on each of the dots you just made. You will now have a paper with 3 holes. Insert the paper in the Trio Flower punch, so that the bottom of the punch is facing up. You will be able to line up those holes so that each one is in the center of each flower. Punch, and you are now ready to insert the brads! They are so small that otherwise I have a hard time getting the flower loose from the hole punch. I have tried 3 times to load the pictures showing you the steps for the above instructions, and everytime I do something wrong - different, but still not what I want. So I will try to post the pictures as a separate post. We will see how that goes! Happy Stamping!

Saturday, July 4, 2009

Instructions for Trio Flower Punch

Step 1


Step 2
This will be your template.


Step 3
Place template over cardstock and mark a dot in the center of each flower with a pen.
After marking dots, use the 1/16" hole punch to punch on the dots.


Step 4
This is what the paper looks like after you have made your 1/16" punches.


Step 5
Now put your marked paper back in the hole punch and punch out your flowers--They are now ready to put in brads and attach to your card with glue dots.

I am not sure that these steps exactly match up with the instructions above, but if you follow the directions under each step, it should turn out right.


Happy stamping!


Happy
4th of
July!

I hope that you and your family are doing things together today and enjoying each other. There should be lots of fireworks and Festivals around. I know there are here. My favorite Festival is the Mountain State Arts and Crafts Fair, held in Ripley, WV each year. I will be fixing barbequed ribs later this evening for my family.

I am getting to work on cards today, and that has been such fun! It has been really quiet here the last couple of days as my granddaughters haven't been here. I miss them when they aren't here. Amazing though how things don't move from one place to another when they aren't here! lol But they will be back tonight ot have barbequed ribs with us! Horray!


Today's 4th of July card is one made by one of my Downline, Monta. She took punches and made a card that emmulates the now retired, INDEPENDENCE DAY set of stamps! She got the stripes on the flag by gluing leftover scraps from punching out a stamp set to a plastic lid and making her own "striped" stamp! Very clever, I think.

Thursday, July 2, 2009

Open House


Today was my Happy New Stamping Year Open House! We made the card that I showed you yesterday, and we made Christmas card tags. I told you that I hoped to take pictures and have them for you to see. I also told you that I hoped I could remember to take the pictures. I did remember and was taking pictures of some of the things on the prize table, but a lady was registering for the Main Door Prize, and I was waiting for her to finish before I took a picture of the door prize. You guessed it, I got to talking and forgot to take the picture! It was a packet with the Fresh Cuts stamp set and 6 of the matching notecards, 6 sheets of cardstock - 1 each of the new In-colors, 1 yard each of the new in-colors polka dot ribbon, big flowers from the Pretties Kit and a variety of rhinestone brads, large grommets, etc. When we drew for the winner at the end of the Open House, the lady who won was still there so she took it home with her. The winner of the prize for: First Person to Arrive was Karla Holsclaw. The children's door prize winner was Caroline. And the Main Door Prize winner was Nancy Kearns. Several of the attendees really enjoyed the Retired Merchandise Table. I do have a few pictures for you, just not all I meant to! The Little Champagne bottles were a big hit! The meatballs were a hit too! Here is the recipe:

Meatballs
1 pound hamburger
1 small onion, chopped fine
1 small can of evaporated milk
Make into walnut-sized balls and cook in skillet with lid on. No need to even turn them over! When cooked, place them in the barbeque sauce and cook on stovetop on low for 20 minutes to 1/2 hour, or else put in a crockpot on low.
Sauce:
14 oz. Heinz catsup
3 Tbsp. Worchestershire sauce
3 Tbsp. brown sugar (I put a little more - to your own taste)
Stir these ingredients together, and cook with meatballs in them. See above.

Wednesday, July 1, 2009

Open House Make and Take


Thank you for stopping by today! I welcome all who are visiting my site through the Remarkables Blog Tour. I am so excited about my Happy New (Stamping) Year Open House. This is the card that we will be making as our make and take on Thursday, July 2nd. I hope that I remember to take pictures so I can share them with you. Each guest will recieve a miniature Champagne bottle filled with stamping goodies--ribbon, punchouts, eyelets, etc. We will be having food, specials, and lots of fun! Wish you all could be here with us. Would love ot have you if you are in the area. It is from 4 p.m. - 9 p.m. We will also be making Christmas package tags! Maybe this year I will be partially prepared for Christmas when it gets here!
Today's card uses the level Three hostess set, Lovely Flowers Bundle. The top of the card was a part of my One Sheet Wonder project, but we will be making that strip separately. Love the new polka dot ribbons in all the new in-colors. I really like using the new large grommets--once I figured out how to get them on the cardstock! So easy when using the foam mat from the Mat Pack. I used the eyelet border punch to do the Mambo Melon piece of cardstock, but you could just as easily use the Scallop Border punch that is this week's Stampin Up Deal of the Week. I used sponges to sponge in the colors in the background of the white cardstock. A quick and easy card! Happy Stamping!